Steps to get started with envoice system
Step 3: Setup Chart of Accounts
Note: Step 6 – 8 are required only if you want to provide access to the account to more users.
Step 1: Account Setup
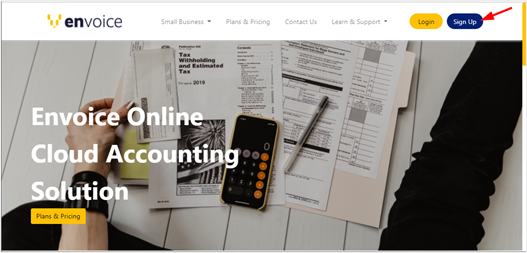
1.1 Visit Envoice Website
1.2 Click on blue Sign Up button at the top right corner of the page.
1.3 Enter the required information and press Sign Up button
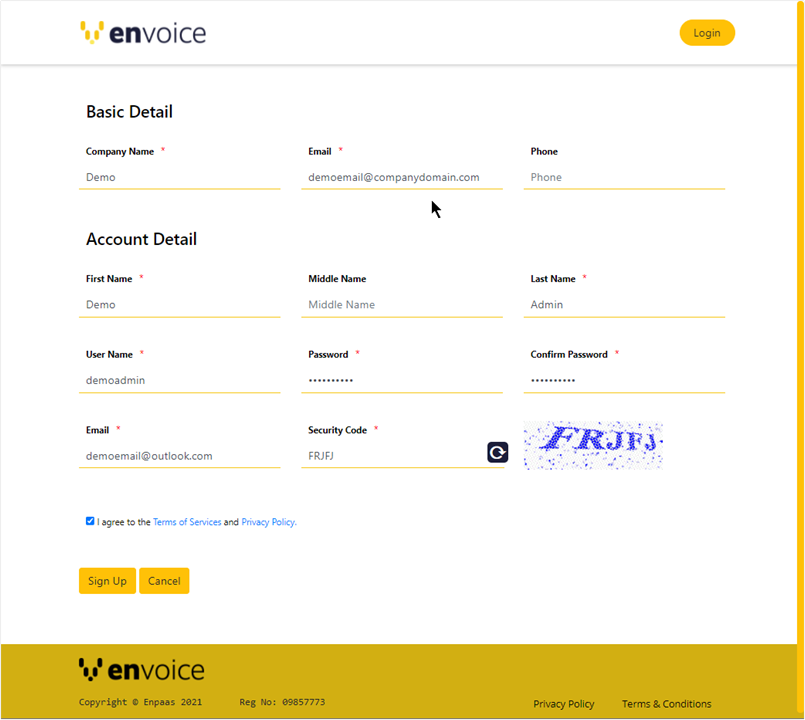
If details entered correctly, you’ll be displayed a message: “You have signed up successfully!”
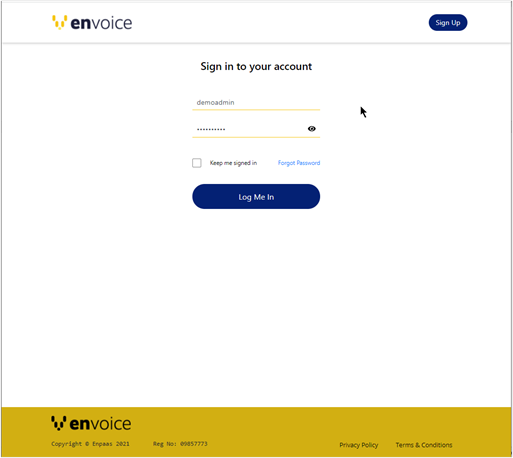
Step 2: Login
2.1 Now you can login with the credentials that you entered while signing up by clicking on the Login button on the top right corner.
Step 3: Setup Chart of Accounts
The chart of accounts is a list of all accounts you can use to record your transactions in system. It helps you categorise your transactions correctly and group similar accounts together to generate reports about your organisation.
3.1 On the left menu bar, click on ‘Chart of Accounts’ menu to open the list of accounts.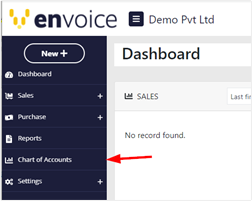
By default, there are 4 accounts which can be used to categorise the transactions namely: Debtors for customers, Creditors for suppliers, VAT Control for VAT and Sales for invoice/credit note. These are the common accounts of every accounting system.

To create an account, click on ‘'New Chart of Account’ button, fill the details and press Submit button.
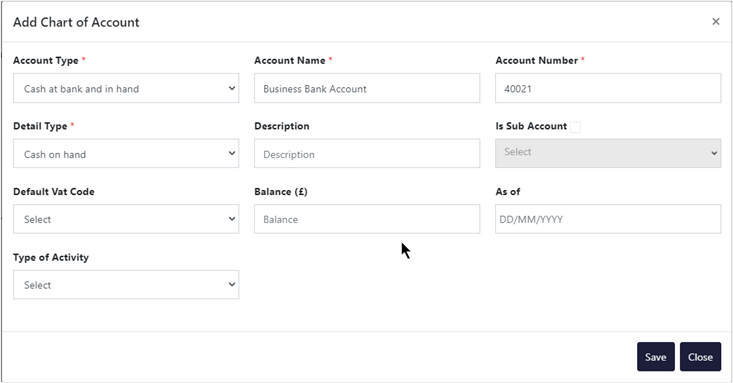
You can add/edit the accounts as per your organisation needs.
Step 4: Setup Products
Products are the items in your inventory or the services that you provide. You can manage the list of products as per your organisation needs.
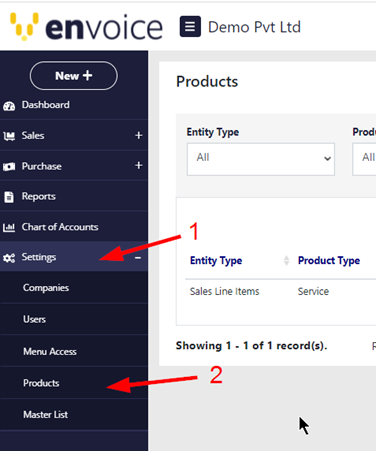
To open the Products list, simply open the Settings menu and then click on the Products sub-menu.
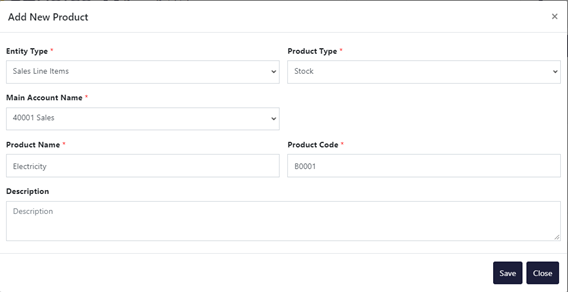
To add a new product, click on New Product button and enter the necessary values and then press the Save button.
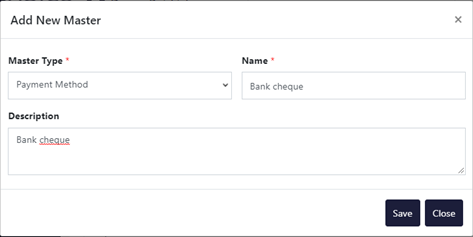
Step 5: Setup Master List
A master is a record that helps manage the transactions. You can manage master records such as VAT, Terms and Payment Method as per your organisation needs.
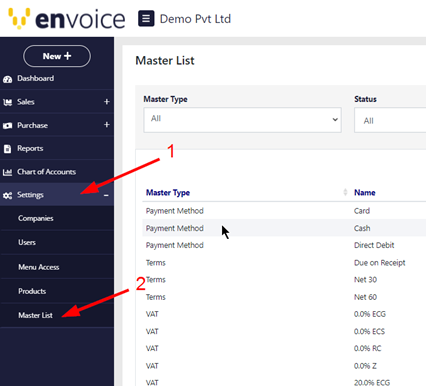
To open the Master List, simply open the Settings menu and then click on the Master List sub-menu.
To add a new master, click on New Master button and enter the necessary values and then press the Save button.
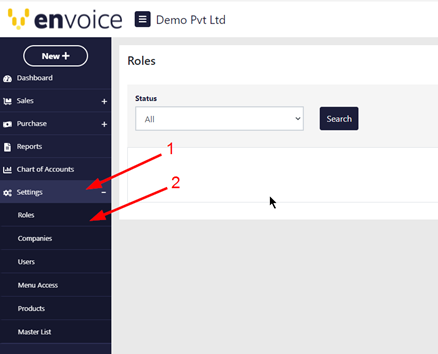
Step 6: Setup Roles
A role is a group of users by which you can manage the access of various features in Envoice accounting system. While adding the users, you can set the role of the users and manage their access by providing access to that role instead of individual users.
To open the roles list, simply open the Settings menu and then click on the Roles sub-menu.
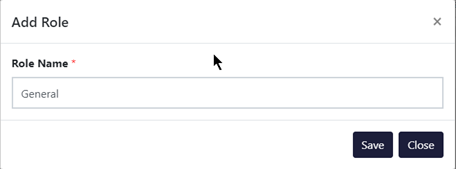
To add a new role, click on New Role button and enter the Role Name and then press the Save button.
Step 7: Setup Users
You can add users in the system who can manage the transactions and view reports.
To open the users list, simply open the Settings menu and then click on the Users sub-menu.

To add a new user, click on New User button and enter the required fields and then press the Save button.
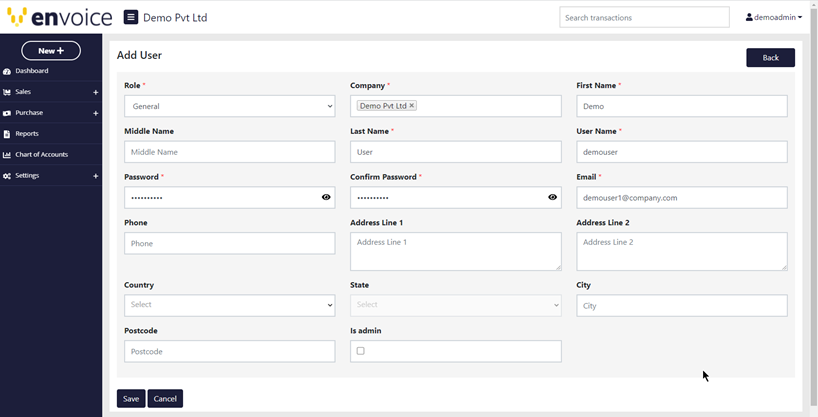
Note: There are two types of users: Admin and Non-admin.
Admin users can add/edit records, but non-admin users can only view the records. To create an admin user, check the Is admin option in the Add/Edit User page.
To allow the users in the system to access the menus and the reports, you need to provide access through the Menu Access page.
There are three types of Access:
Side Menu: List pages in the system such as Invoices, Bills, Chart of Accounts etc.
New Menu: Add/Edit pages in the system such as Add/Edit Invoice etc.
Reports Access: Reports in the system such as Trial Balance, Balance Sheet etc.
To open the Menu Access page, simply open the Settings menu and then click on the Menu Access sub-menu.
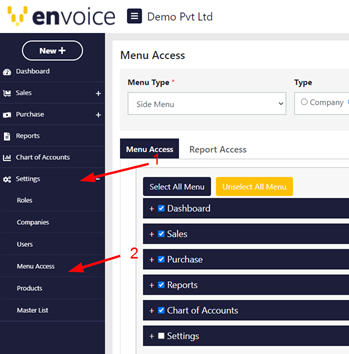
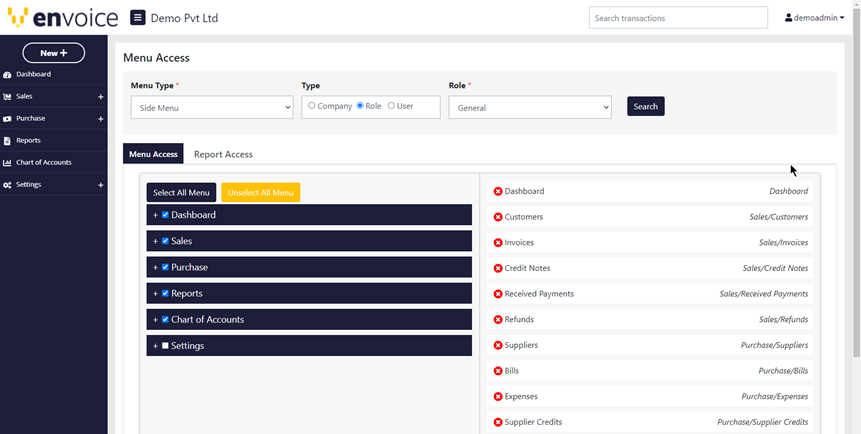
For example, in order to provide access of list pages to a Role (set of users), select Menu Type as Side Menu, Type as Role and select the Role and press the Search button.
Select the desired items by clicking on the checkbox and then press Assign button at the bottom. Now the users having the selected Role will be able to access the selected pages.
Note: To give access to Reports, first Reports option should be checked in Menu Access tab and then select specific Reports in the Report Access tab.